Pete

Author Archives

  • What Is A SAP BW DSO And ODS?

    [quote]An SAP BW DSO stands for Data Store Object and was previously called an ODS which stands for Operational Data Store. Why has the name changed? Don’t ask me! SAP seem to change the names of there product names more often than I have hot dinners. I am sure they have their reasons 🙂 .[/quote]

    A DSO is a SAP BW object primarily used to store detailed transactional data at a granular (document) level. Unlike multidimensional data storage objects like InfoCubes, DSO’s are designed as a 2-dimensional flat database table that contains key figures and characteristics. Data can be aggregated as well be over-written.

    There are 3 types of DataStore Objects that are generally used in BW systems: Standard, Write Optimized, Direct Update. In this article by Roula Sawma she focuses mainly on the architecture of these three types of DSO’s and the main functions of the objects themselves.

  • How To Create Exceptions In The SAP BW Query Designer

    [quote style=”boxed”]How do you highlight unusual deviations of key figure values in a SAP BW BEx Query? This question is often asked by concerned managers, marketing and sales people who want to spot these deviations as early as possible so they can act fast to changes in their business. One technique is by creating Exceptions in the SAP BW Query Designer.[/quote]Exceptions are used to identify deviations from pre-defined threshold values or intervals. Any data in your BW query that varies from these thresholds are marked with different colors in the query result. That way you can spot any extraordinary variations from expected results straightaway.

    Step By Step – Creation Of Exceptions

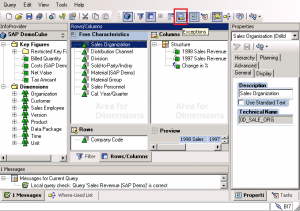
    Log in to query designer and choose the query for which you want to create the exception and click on the Exceptions button clip_image001 followed by New Exception.

    SAP BW Query Designer

    SAP BW - Query Designer

    SAP BW New Exception

    SAP BW - New Exception

    Press the Edit button in the properties area on the right of the window. The properties screen of the exception will then appear.

  • Beginners Guide To ABAP – Module 2 – Data Dictionary – Create A Table Part 2

    This is a continuation of the previous video here: Create A SAP Table Part 1. Watch that video first.

    Value Ranges

    Next we will take a quick peep at the Value range tab. Now this tab is all about setting valid value ranges for the domain that you are creating. If you set a value range and the user enters a value in a field outside the valid value range that you set up, they will be shown an error message and be requested to enter a valid entry.

    Create A Sap Table - Part 2There are three options to choose from when creating value ranges.

    1. The first is ‘Single Values – This is where you actually enter a list of individual valid values that a user can enter.
    2. The next is ‘Intervals’ – If you have many values but they are all related or in a sequence you can enter the lower limit and the upper limit for each range. For example, a lower limit of 1, an upper limit of 9, and that saves you entering 9 individual single values. This ensures a user can only enter a value that falls within the ranges that you specify.
    3. The last option you have is ‘Value table’ – When you have a large number of possible entries it is quite common to use a Value Table instead of a value range or list of single values. With a value table, you specify a complete valid value table entry list. But please note that if you use this option you must also introduce Foreign Keys to your table to ensure the user’s entries are tested against the values stored in the value table that you create.
  • Beginners Guide To ABAP – Module 2 – Data Dictionary – Create A Table Part 1

    In this lesson we are going to start creating our first SAP table. With your SAP GUI open and logged in, the first thing we’re going to do is find the Data Dictionary in the SAP menu.

    Expand the Tools menu and choose the ABAP Workbench. Under the Development option you will see SE11 – ABAP Dictionary. Double click it, and you’ll then be presented with the first screen for the ABAP Dictionary.

    Create A Sap Table - Part 1Let’s go through the different options that we see on the screen.

    • The first one we see is Database tables. This is where we can enter an existing table name and view the technical components of any SAP table.
    • Then we have Views. A View is similar to a table but it does not contain data. It brings together fields from 1 or more other tables by defining relationships between fields of these tables.
    • Then we have Data types. Data types are what can make up our database tables, and we’ll have a look at those soon.
    • The other options available are Type groups, Domains, Search help and Lock objects.

    Let’s focus on creating a table, first of all. So, what we want to do is click on the Database table option and we will focus on creating a transparent table. There are other types of tables such as Cluster Tables and Pool Tables, but you don’t need to concern yourself with those just now.

    When you create a transparent table you need to ensure the table name adheres to the customer-defined name space. This means we need to start our tables with the letter Z or the letter Y. Most commonly, you’ll see the letter Z being used.

  • Beginners Guide To ABAP – Module 2 – Introduction To The Data Dictionary

    Welcome to the next module in this Beginners Guide to ABAP. In this module, we’re going to focus specifically on the Data Dictionary. The Data Dictionary (Transaction Code SE11) is the main tool that we use to look at, understand, and enhance the database and database tables that are used by our SAP system. We […]

  • How To Monitor Your Background Jobs With CCMS In SAP Systems

    As a Basis Consultant how many times have you been asked to monitor a job and warn somebody of its possible failure, or delays, and so on? Most probably, more than once! In my case, many times and on various occasions I have been asked to automate this very task. Some jobs can take a very long time and I do not enjoy watching the screen day and night time and time again. Well, at least not for job monitoring! So, what I have decided to write about today is the proposition of a quick and  simple solution for monitoring several jobs automatically.

    The Limitations Of This CCMS Monitoring Solution

    I mentioned monitoring several jobs, but there are limits to the solution I’m going to show you. My own experiments have showed that trying to monitor more than 100 jobs is not a good idea I will not work very well. You see, the major problem is that the Internal Dispatcher has to loop through many tasks including the job monitoring task within a 5 minute time period. So as long as your list of jobs is not too long and the loop can be achieved with the 5 minute time limit this solution should work just fine.

    Initial Configuration

    First of all, we need to select a job to be monitored and I’m not talking about a single report. Pick a real batch job; one that may contain several reports.

    For this example I will first call the transaction SE16 (You may know this one, don’t you?), and in the table name field, just type ALBTCMON. See screen below:

    SE16 Data Browser - Table ALBTCMON

    Next, press the “F5” key, or click on the Create Entries button.